Best Tips to Design Your Own Circuit Board Easily?
Designing your own circuit board can be an exciting journey. It allows for creativity and innovation. However, many face challenges along the way. Understanding the basics is essential. This guide will provide practical tips that will make the process easier.
When you design your own circuit board, you will need to consider various factors. These include layout, functionality, and complexity. Mistakes can happen, and that’s okay. Each error is a learning opportunity. Successful designers often revisit their designs multiple times. They refine details and improve functionality.
Don't rush the process. Take time to plan your circuit layout. Use design software wisely to visualize your project. Start with simple designs before moving on to complex circuits. Each step counts, and every mistake teaches valuable lessons. Embrace the journey of creating your own circuit board.
Understanding the Basics of Circuit Board Design
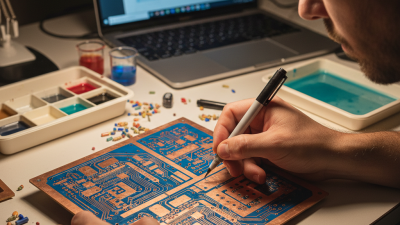
Understanding the basics of circuit board design can feel overwhelming at first. A circuit board is a vital component in any electronic device. It connects various components like resistors and capacitors. The key to a well-designed board is understanding how these components interact. Start by sketching your ideas on paper. This helps visualize your design before working on software.
Once you have a sketch, choose a PCB design software. Many options are available online. Learning the software takes time and effort. Don’t be discouraged if your first design isn’t perfect. Mistakes are part of the learning process. Pay attention to trace widths and spacing. These details can significantly affect performance.
Consider the layout carefully. It should minimize noise and interference. Components should be placed to optimize signal flow. However, layout can be tricky. You may find some placements inefficient or problematic. Reflecting on these challenges will make you a better designer. Take breaks to clear your mind. Returning with fresh eyes often reveals overlooked issues. Ultimately, patience and practice are your best allies in mastering circuit board design.
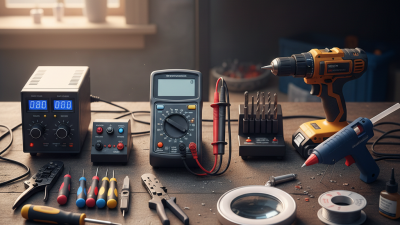
Choosing the Right Tools for Designing Circuit Boards
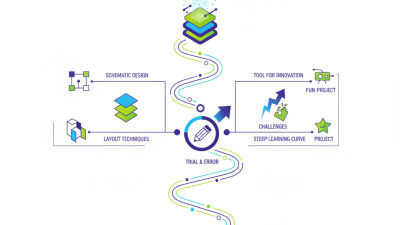
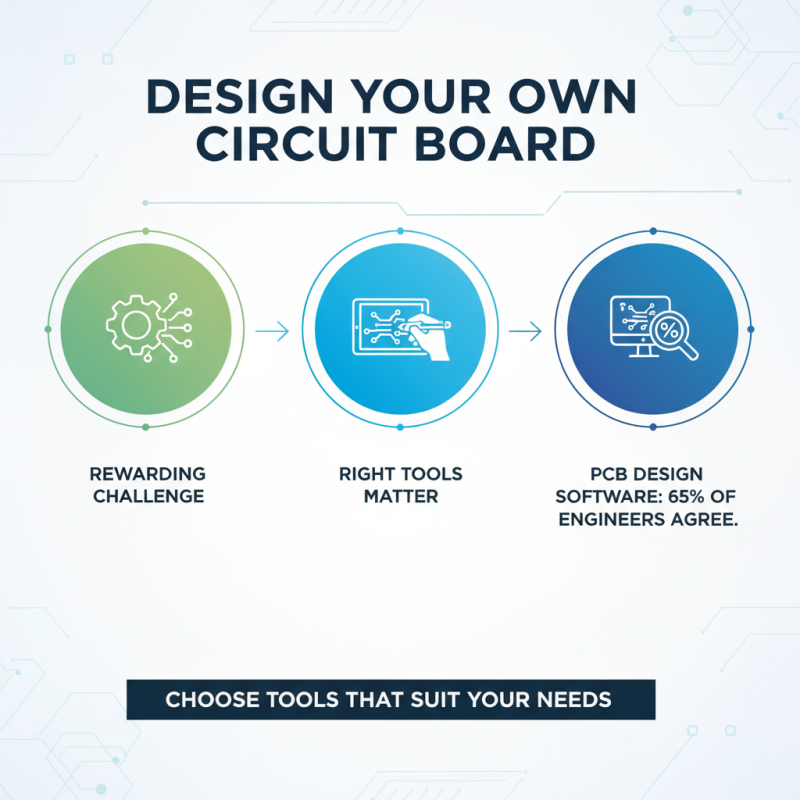
Designing your own circuit board can be a rewarding challenge. The right tools make a significant difference. Many designers start with PCB design software. According to industry reports, about 65% of design engineers rely on specialized software for efficiency. Choosing tools that suit your needs is critical.
One popular category includes schematic capture tools. These allow users to create circuit diagrams easily. Tools that offer user-friendly interfaces can reduce errors. However, not all tools are equal. Some may have limitations that can frustrate you. Furthermore, many lack support for advanced features. This can lead to wasted time during the design process.
Simulation tools are another essential aspect. They help in testing your designs before manufacturing. Research indicates that testing can cut development errors by up to 70%. Still, many designers skip this step, which can be a costly mistake. Investing time in learning these tools is beneficial. Balancing usability and capabilities is important. Remember, a good design requires good planning and testing.
Step-by-Step Process for Creating Your Circuit Board Layout
Creating your own circuit board can be exciting yet challenging. Understanding the layout process is essential to success. Start by sketching your design on paper. Visualizing your circuit helps highlight key components. Use symbols for resistors, capacitors, and ICs. Precision at this stage pays off later.
After sketching, choose a software tool. Many are user-friendly and offer tutorials. Import your sketch into the software. Arrange components considering space and connections. Keep traces short to reduce interference. Ensure all parts fit within the board’s dimensions. Many users overlook this crucial detail, leading to a cramped design.
PCB design often comes with trial and error. It’s normal to make mistakes. Don’t hesitate to redo parts of your layout. The process can be tedious, but refining your work is rewarding. Take breaks and revisit with fresh eyes. Each iteration brings you closer to a polished final product.
Components Used in Circuit Board Design
This bar chart illustrates the number of different components commonly used in circuit board design. As depicted, resistors are the most frequently used components, followed by capacitors and diodes.
Common Mistakes to Avoid When Designing Your Own Circuit Board
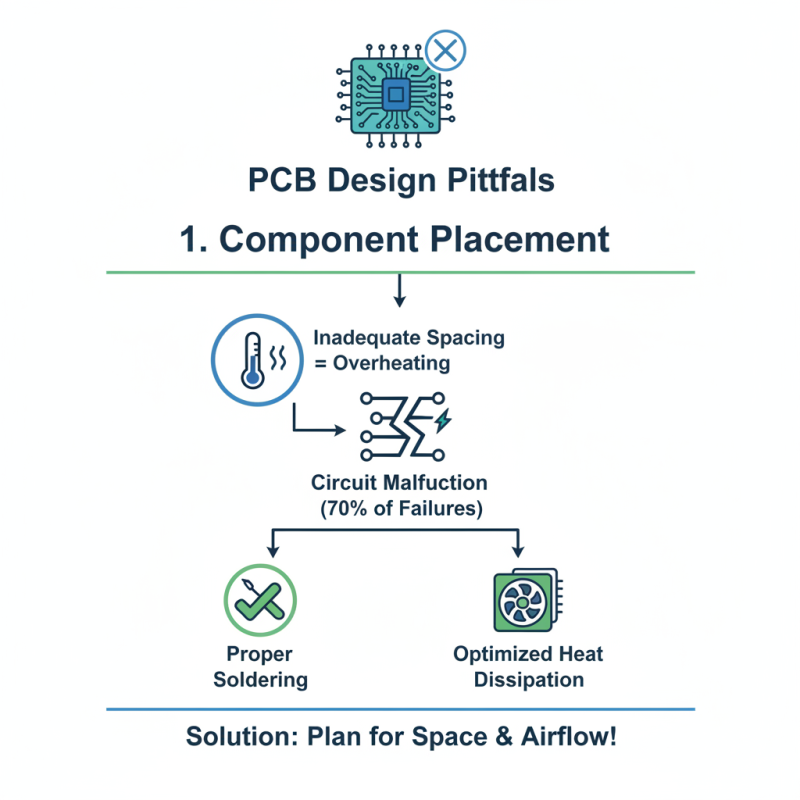
Designing your own circuit board can be rewarding, but common mistakes can derail your project. One major issue is improper component placement. Research indicates that nearly 70% of design failures stem from inadequate spacing between components. This can lead to overheating and circuit malfunctions. Ensure your layout optimizes heat dissipation and allows for proper soldering.
Another frequent mistake involves overlooking power requirements. Many designers fail to accurately calculate current and voltage ratings, resulting in overloaded circuits. According to industry reports, 40% of DIY circuit boards experience power-related failures. Always double-check your power specifications. If components can't handle the load, you may need to rethink your approach.
A third common pitfall is neglecting to create a clear schematic. Without a well-defined diagram, errors are all but guaranteed. It’s estimated that 30% of new designers skip this crucial step, resulting in miswired connections. Creating a detailed schematic can help visualize the circuit. It guides you through the design process and helps prevent costly mistakes.
Tips for Testing and Finalizing Your Circuit Board Design
Testing and finalizing your circuit board design is crucial for success. After completing your initial design, it’s time to evaluate its functionality. Start by simulating the circuit using reliable software. This step helps identify potential errors before moving to physical testing. Be patient; simulations can reveal flaws you might overlook.
Once you're confident in the design, prototype your circuit board. Carefully assemble the components. Double-check every connection. Mistakes at this stage can lead to malfunctions later. Test the board intensively in different conditions. Some designs work well in one scenario but fail in others. Document any issues that arise. This reflection will guide your revisions.
Follow-up testing is essential. After making adjustments, run the tests again. Are the results consistent? If not, reconsider your approaches. It’s a journey, not a destination. Each iteration brings new insights. Embrace the learning process and improve your design with every cycle.