2026 Top Tips to Make Your Own Circuit Board Effortlessly?
Creating your own circuit board can seem daunting. However, with the right tips, you can simplify the process. This guide provides strategies to make your own circuit board effortlessly.
Many people struggle with circuit design. They often feel overwhelmed by complicated diagrams and technical jargon. It's easy to get lost in the details. But remember, starting small is key. Focus on simple projects first. Use readily available materials. This will help build your confidence.
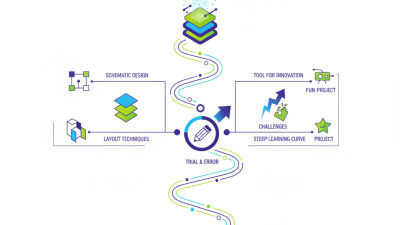
Common mistakes can happen. You might choose the wrong components or make layout errors. Reflect on these missteps. Learning from them will improve your skills. Embrace the trial and error process. Each attempt brings new insights. Ultimately, the journey of making your own circuit board is just as important as the finished product.
Understanding Circuit Board Basics and Components
When embarking on the journey of creating your own circuit board, understanding the basics is crucial. A circuit board is a board that connects electrical components. These components include resistors, capacitors, and integrated circuits, each playing a unique role. Resistors limit current flow, while capacitors store energy. Knowing these functions is essential for designing effective boards.
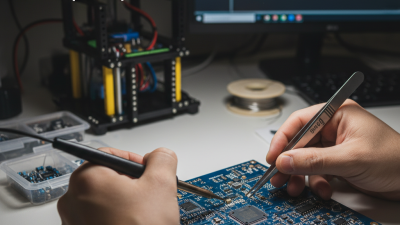
For a smooth crafting experience, start with a clear schematic. This visual representation will guide your layout. Tip: Sketching on paper can help visualize component placements. This prevents mistakes and saves time during assembly. Don’t rush this step—misplaced components can lead to failures.
Ensure you have quality materials. Cheap components might break easily. A tip is to test components before use. They may look fine but could fail during operation. If a circuit doesn’t work right away, troubleshoot by checking each connection. This will help you understand where improvements are needed. Many beginners overlook this, leading to frustration. Embrace mistakes as learning opportunities.
2026 Top Tips to Make Your Own Circuit Board Effortlessly
| Tip Number |
Tip Description |
Essential Tools |
Component Types |
| 1 |
Understand basic circuit principles before starting. |
Multimeter, Breadboard |
Resistors, Capacitors |
| 2 |
Sketch your circuit design on paper or software. |
Circuit Design Software |
Diodes, Transistors |
| 3 |
Choose the right materials for your PCB. |
Copper Board, Etching Solution |
Integrated Circuits |
| 4 |
Etch the board carefully using safe techniques. |
Etching Tool, Safety Gear |
Connectors |
| 5 |
Verify the assembled components before powering up. |
Soldering Iron, Flux |
LEDs, Switches |
Choosing the Right Materials for Your DIY Circuit Board
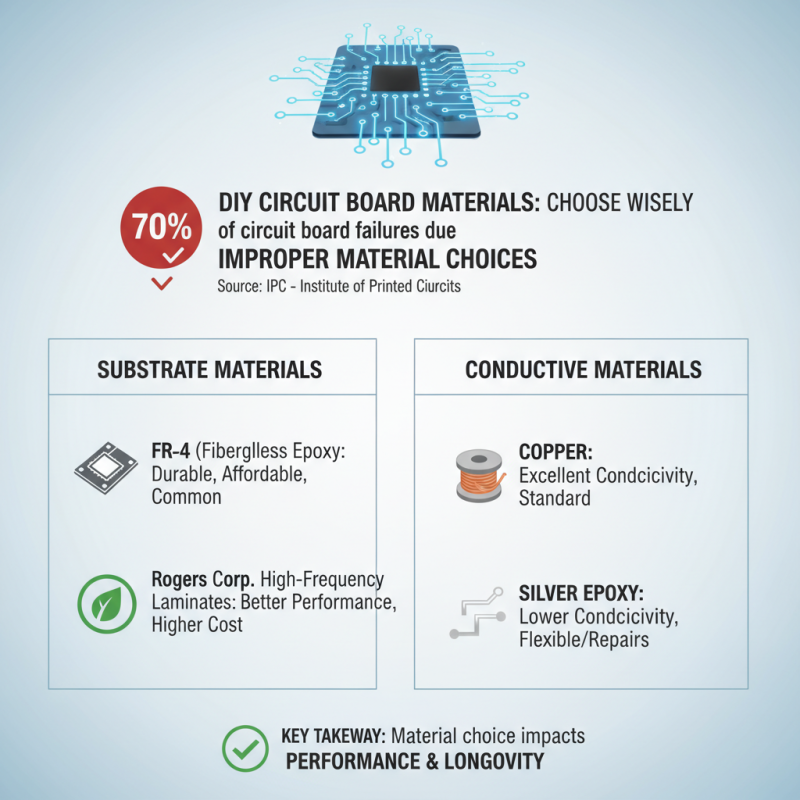
When creating a DIY circuit board, material selection plays a crucial role. The ideal materials directly influence the board's performance and longevity. According to the IPC (Institute of Printed Circuits), nearly 70% of circuit board failures stem from improper material choices. This emphasizes the need for careful consideration when selecting substrates and conductive materials.
Focusing on substrates, FR-4 is widely used due to its excellent electrical properties and cost-effectiveness. However, it may not be optimal for high-frequency applications, where specialized materials like Rogers may perform better. Copper thickness is also vital. IPC recommends adhering to certain standards for copper weight to ensure reliable conductivity. Choosing the right thickness affects both the board's rigidity and current capacity.
Quality solder masks are often overlooked yet essential for protecting the board. A poorly applied solder mask might lead to shorts or oxidation over time. Experimentation may lead to unexpected outcomes. For instance, using non-standard materials can yield unique results, but they may also complicate the design process. A local maker community often finds value in sharing experiences—what works, what doesn’t. Understanding these materials and their nuances can be the difference between a successful project and one that requires rework.
Step-by-Step Guide to Designing Your Circuit Layout
Designing your own circuit layout can be a rewarding challenge. Start by sketching your ideas on paper. Visually organizing components helps you see the overall structure. Once that’s clear, use software tools. Many options are available, but finding the best fit might take some time. According to recent industry reports, about 70% of designers rely on digital tools for efficiency.
Next, focus on component placement. Keep connections short. This minimizes interference and improves performance. A 2022 study highlighted that proper placement can cut signal loss by 30%. It’s essential to consider the thermal aspects too. High-heat components should be spaced out to prevent overheating. Make sure to leave enough room for routing traces, which can be tricky.
When routing traces, think about the current capacity. Wider traces can carry more current, but they also take up space. Balancing these factors can be difficult. Some designers struggle here. Mistakes in this phase often lead to redesigns. Reflecting on these challenges helps improve future projects. Always verify your design before proceeding to production. This step can save both time and resources.
Techniques for Etching and Fabricating Your Board
Etching and fabricating your own circuit board can seem daunting. However, with the right techniques, it can be both rewarding and manageable. According to recent industry reports, the DIY electronics market is expected to grow by 8% annually. This indicates a rising interest in personalized circuit board projects.
One effective technique for etching is using a toner transfer method. This involves printing your design on glossy paper, then transferring it to a copper-clad board using heat. It’s critical to ensure even pressure during the process. A mistake here can lead to poorly defined traces.
Tip: Always test your design on a piece of scrap material first. This will save you time and resources.
Another method is the use of chemical etching. Ferric chloride is a common etching solution that reacts with exposed copper. Safety is a key concern here, as exposure can be hazardous. Proper protective gear should always be worn.
Tip: Work in a well-ventilated area to minimize health risks. Ill-defined instructions can lead to frustration.
Precision is crucial in both methods. Keep in mind that practice makes perfect. Many DIY enthusiasts face setbacks, and that's part of the learning curve.
Top Techniques for Etching and Fabricating Your Own Circuit Board
Testing and Troubleshooting Your Finished Circuit Board
Once you've finished assembling your circuit board, it's time to dive into testing and troubleshooting. Begin by visually inspecting all connections. Look for any solder bridges or cold solder joints. These issues can cause shorts or intermittent connections. Next, use a multimeter to check for continuity. This step ensures that current can flow along designated paths.
If your circuit isn’t functioning as expected, don’t panic. Start by rechecking the components. It's easy to misplace diodes or resistors. Ensure they are correctly oriented and within the specified values. Pay special attention to polarized components. A mistake here can disrupt the entire board's operation.
Next, apply power cautiously. Monitor for any unusual heat or smells. If something doesn't seem right, disconnect power immediately. This instinctual step can save your board from irreversible damage. Document any odd readings or behavior. Reflection on these details can reveal patterns in your troubleshooting process, enhancing your future projects. Testing is as much about learning as it is about refining your circuit board.